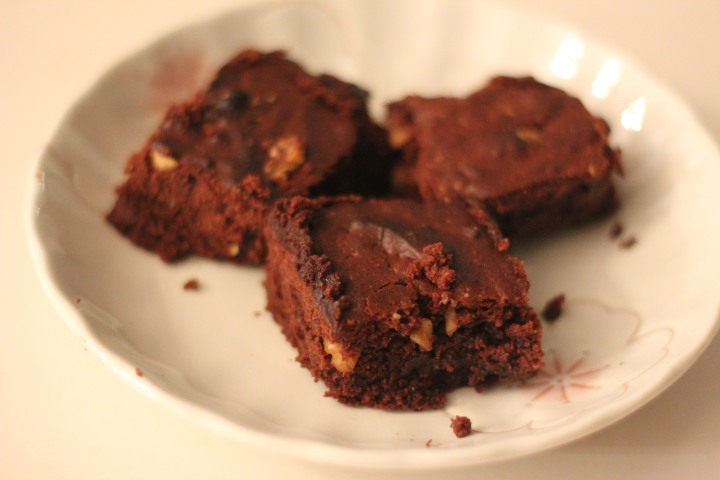
these are pretty easy to make
i used Shiberty’s recipe: http://shiberty.com/2012/01/baking-tutorialthe-best-brownies-ever/

these are pretty easy to make
i used Shiberty’s recipe: http://shiberty.com/2012/01/baking-tutorialthe-best-brownies-ever/


credits: http://www.herworldplus.com/solutions/recipes/recipe-learn-how-make-famous-strawberry-watermelon-cake-sydneys-black-star-pastry

Strawberry and watermelon cake with rose-scented cream
By Christopher Thé, chef-owner of Black Star Pastry, Sydney, Australia
Serves 12
INGREDIENTS
For the almond dacquoise:
150g almonds, coarsely chopped
150g pure icing sugar, sieved
5 egg whites
135g caster sugar
For the rose-scented cream:
300ml thickened cream
30g caster sugar
2 tbsp rosewater
250g seedless watermelon, thinly sliced
60ml rosewater*
4 tbsp caster sugar
40g almond meal
500g strawberries, halved
10 seedless red grapes, halved
1 tbsp slivered pistachios*
1 tbsp dried rose petals*
*Available at Phoon Huat stores including #02-01 Buona Vista MRT Station (6776-0153)
DIRECTIONS
1 To make the almond dacquoise, preheat oven to 200C. Pulse almonds in a food processor until finely ground, then combine in a bowl with icing sugar.
2 In another clean mixing bowl, whisk egg whites with an electric mixer until soft peaks form, about 3-4min. Next, gradually add caster sugar and continue whisking until stiff peaks form, for 1-2min. Gently fold the almond-icing sugar mixture into the egg whites.
3 Line a 30cm x 40cm tray with baking paper, and spread the almond dacquoise mixture evenly. Bake for 10-15min until golden. Set aside to cool on the tray, then cut in half lengthwise. Leave it to rest for at least 4h, or overnight.
4 Arrange watermelon slices in a single layer on a wire rack. Sprinkle with 20ml rosewater, then sprinkle with 2 tbsp sugar. Let it soak for 30min, then pat dry with kitchen towels.
5 For the rose-scented cream, whisk cream and sugar in an electric mixer until soft peaks forum. Gradually add rosewater and whisk until you have stiff peaks. Do not over-whisk.
6 Spread 1/3 of rose-scented cream evenly over half the dacquoise. Sprinkle with half the almond meal, and layer watermelon over the dacquoise, You might need to trim some of the watermelon slices to fill the gaps.
7 Sprinkle the remaining almond meal over the watermelon. Spread half of the remaining rose cream. Layer with the rest of the dacquoise and rose cream. Refrigerate until firm, about 1-2 hours.
8 Combine strawberries with the remaining 20ml rosewater and 2tbsp sugar in a bowl. Toss to combine and set aside for 15min. Carefully arrange the strawberries onto the cake, gently pushing into the cream. Trim the edges of the cake, scatter it with grapes, pistachios and rose petals. Serve.
TIP: Wipe mixing bowls with a dash of vinegar and salt to remove impurities before whipping egg whites. If the bowl is dirty, the egg whites might not be able to form stiff peaks.
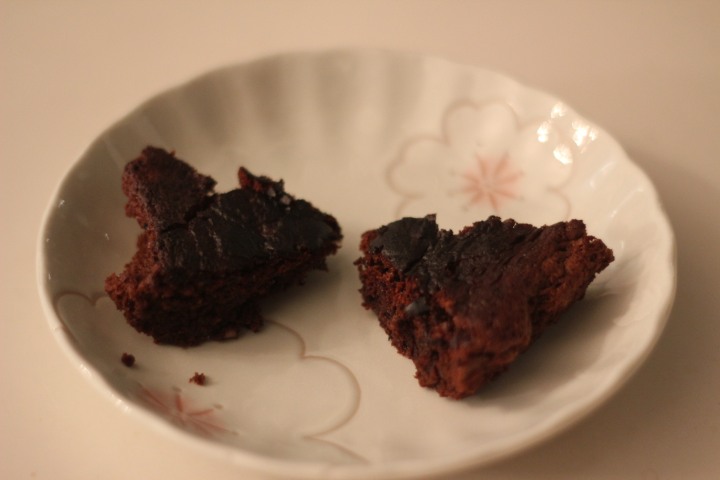
I baked some brownies today, will post the recipe soon :’))
so far i find that the easiest things to bake are
http://www.crunchycreamysweet.com/2016/04/26/one-bowl-brownies-recipe/
http://shiberty.com/2012/01/baking-tutorialthe-best-brownies-ever/
I personally prefer shiberty’s recipe :’))
The below recipe is from Shiberty’s website, credits: http://shiberty.com/2012/01/baking-tutorialthe-best-brownies-ever/
I am just writing it here for remembrance’s sake :’))
“YOU WILL NEED:
An 8″ circle baking tin for baking the brownies in
Non-stick cooking spray
♥ — 2 eggs
♥ — 1/2 cup butter (melted, salted. if you do not have salted butter, use 1/2 teaspoon salt)
♥ — 3/4 cup white sugar
♥ — 3/4 cup self-raising flour
♥ — 1/2 cup cocoa powder (unsweetened)
♥ — 1/2 tablespoon vanilla extract
♥ — 3 tablespoons chocolate milk (or only 2 tablespoons if you like it fudgey!)
♥ — 1/2 cup milk chocolate chips
The last part is optional. You can add milk chocolate chips, or dark choc, or white choc, or nuts (yuck!) whatever floats your boat. I chose to use just milk choc chips and they turned out nommilicious. If you use something else and they don’t turn out as good, that’s not my fault.![]()
Step 1: Preheat your oven to 180 degrees C. Spray your non-stick cooking spray over your 8″ baking tin, or if you don’t have cooking spray, grease it lightly with butter.

Step 2: Combine the vanilla extract, sugar, and butter in a big bowl. Mix well.

Step 3: Add the eggs in, one by one while mixing thoroughly.

Your mixture should look something like this now!

Step 4: Carefully combine the cocoa powder and flour to your previous mixture. This will thicken up the batter a lot, so don’t freak out if it’s really dry, we’ll be adding milk in a bit.

Step 5: Pour in 3 tablespoons of chocolate milk and lightly stir in the chocolate chips. It will take a minute or two of constant slow stirring for your batter to absorb the chocolate milk in, but once it does..
You will get the wonderfully rich and gooey batter as seen above! ^.^ If your batter is still too stiff (due to incorrect measurements of previous ingredients?), you can try adding more chocolate milk, bit by bit, till you get a batter consistency you’re truly satisfied with. At this point you can taste-test the sweetness to see how you like it too! You can always adjust or tweak this recipe to your own liking. But don’t do it if you’re a total noob coz then you might screw it up, lul.
♥ Note – If you like heavier, fudgey brownies (which is what is served outside most of the time), 2 tablespoons will do. Or if you want like a block of chocolate, use 1. LOL. I prefer slightly lighter texture so I used 3.

Step 6: Pour the batter evenly into your greased baking pan and set the timer for 40-50 minutes, or until you insert a toothpick / chopstick and it comes out clean.
….Now THIS is the tricky part, and I advise to read carefully. This is what other baking recipes don’t tell you.
If you use a different shaped or sized pan, cooking time will be different, and I can’t tell you how long it’ll take because I don’t know what size you’ll use. I strongly suggest using an 8″ circle pan like I did. If you use a bigger baking pan and your batter is thinner, reduce cooking time, and vice versa.
Everyone’s oven also works differently, so cooking time for your brownies may differ even if you do use an 8″ pan. My oven is old and battered, from the hundreds of cupcakes and cakes I do on a daily basis, so I don’t think it’s working as well as it used to anymore. Stuff that used to take 20 minutes to bake, now takes about 30.
So my timing of 40-50 minutes is a rough estimate for you guys.. mine actually took almost 50 mins, but your new swanky oven may take only 40. If your oven is even older and in worse condition than mine, perhaps it takes 50+ minutes. I advise to start checking on your brownies when you’re nearing the 40 minute mark. Check back on it every now and then, and poke a toothpick through. Once it comes out clean, you can leave it in for another few minutes for a slightly crispy top if it hasn’t already formed yet!!!![]()
Just don’t overcook it, or your brownies will be hard / too crispy / dry instead of moist and gooey / fudgey like it’s supposed to be. Once you’re sure your brownies have cooked perfectly, take it out of the oven, let it cool for awhile and then remove from the pan.
.
.
.
.
.
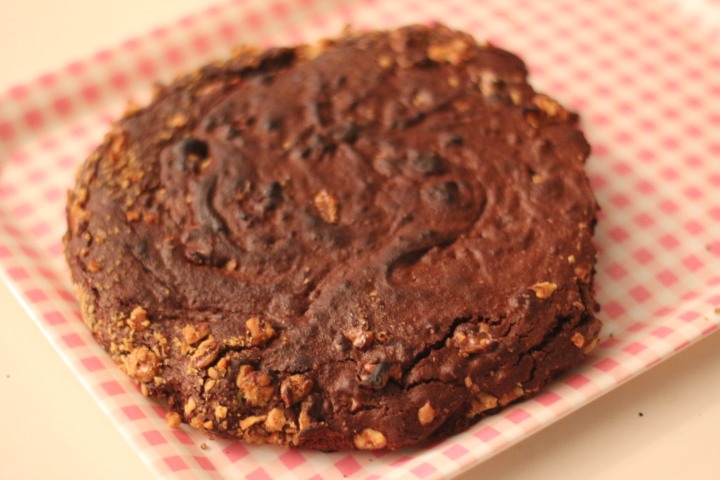
Hopefully, yours will turn out to look something like….

THIS!!
Ok hahaha I know that doesn’t look quite right sitting there like that because 1) It’s circle shaped, and brownies are meant to be square-ish. That’s not a big deal to me, but if it is to you, feel free to use a square shaped tin of a similar size instead.
And 2) It has a lot of wholes on the top. I used fat chopsticks to poke it instead of toothpicks so they’re kinda obvious”
i’ve been on a slight baking hiatus because i was in krabi last week, and this week is break week so………… i am gonna try to bake:
I hope that one day, i can bake a humming bird cake 🙂
Today it is Saturday, 9th September 2017
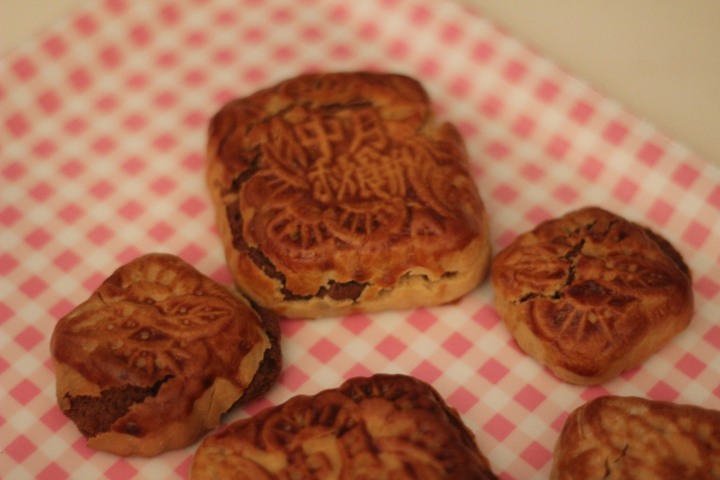
Was very tired after a full day workshop, so when I came home I napped. When I woke up, I thought, I needed to make mooncakes because the mooncake season would be ending soon so i took a free ride (thanks to grab $6 promos) to ang mo kio’s phoon huat to get my supplies.
thank God for the experience of making 1) baked mooncakes, 2) snowskin mooncake, although i forgot to buy shortening for the snowskin mooncake. I really enjoy making baked mooncakes, they are so fun to see coming to fruition
these are the recipes I attempted to use:
http://www.noobcook.com/traditional-baked-mooncakes/
http://www.noobcook.com/snowskin-mooncakes/
note to self;


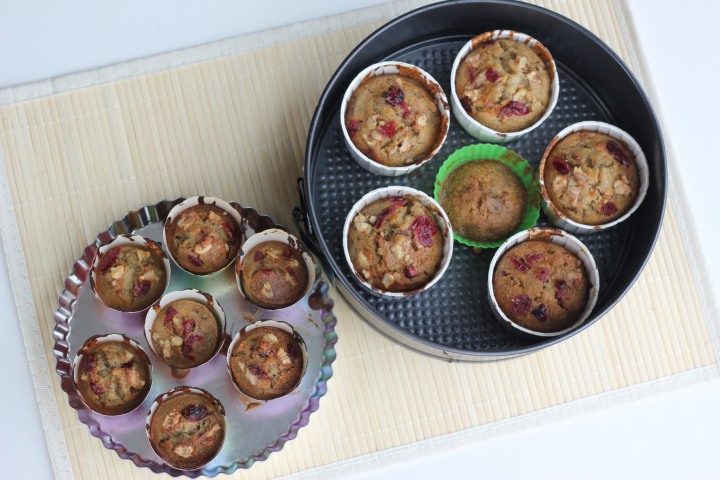
i baked some banana cranberry walnut muffins for my part b tutorial group on tuesday… glad they enjoyed it 🙂 thank God I got it right this time………
Recently i also checked out a sheng siong near my house which sells cheaper baking essentials as compared to fairprice… phoon huat is pretty competitive with its prices too 🙂
so inspired after meeting dear Deedee today, who gifted me a book entitled ‘Savour’ by Dr Tam Wai Jia :’) She is 29, but so inspiring, as a Christian, a mother and a woman. I’m 23 years old and thinking to myself: what am I doing with my life? Hahaha.

